Articles > Gardening Tips using Coffee Grounds
Composting is the natural process of decomposing organic materials into a nutrient-rich soil conditioner. There are two main types of composting: hot composting, which involves actively managing the compost pile to accelerate the decomposition process, and cold composting, which takes a longer time and requires less maintenance.
Common materials that can be composted include kitchen scraps (fruit and vegetable peels, coffee grounds), yard waste (leaves, grass clippings), and brown materials (cardboard, paper). Composting these materials has several benefits, including enriching the soil with essential nutrients, improving soil structure and water retention, and reducing the amount of organic waste sent to landfills.
Brown materials, such as dry leaves and shredded paper, provide carbon to the compost pile, while green materials, like food scraps and grass clippings, contribute nitrogen. Balancing the ratio of brown to green materials is essential for successful composting, as it helps maintain the right conditions for decomposition.
In conclusion, composting is a valuable practice that not only benefits soil health but also contributes to waste reduction by recycling organic materials into a useful product for gardening and farming.
Composting coffee grounds offers several benefits, making it a valuable addition to any compost pile. Coffee grounds are rich in nitrogen, which is an essential nutrient for plant growth and a key component of fertile soil. Adding coffee grounds to your compost will help balance the carbon-to-nitrogen ratio, ensuring a healthy environment for the decomposition process.
In addition to providing valuable nitrogen, coffee grounds also improve the overall structure of compost. They help to increase the aeration and drainage of the pile, preventing it from becoming too compacted and waterlogged. This creates the ideal environment for beneficial microorganisms to thrive, further speeding up the decomposition process and producing high-quality compost.
By incorporating coffee grounds into your compost, you are not only diverting waste from the landfill but also creating a nutrient-rich soil amendment that will benefit your garden. So, the next time you make a pot of coffee, consider saving the grounds for your compost pile to harness their nitrogen-boosting, structure-improving, and microorganism-attracting properties.
When starting a new project, it’s important to gather all the necessary materials before diving in. Whether it’s a DIY home improvement task or a fun crafting project, having the right materials on hand can make all the difference. From tools and equipment to specific supplies and ingredients, being prepared with the right materials can ensure a smooth and successful project. Read on to learn about the essential materials needed for different types of projects, and how to properly gather and organize them for a stress-free and efficient experience.
Coffee grounds can be a valuable addition to any garden, offering several benefits for both the soil and plants. When used as a natural fertilizer, coffee grounds provide essential nutrients such as nitrogen, potassium, and phosphorus, which can promote healthy plant growth and improve soil structure. Additionally, coffee grounds can help to increase the acidity of soil, making it an ideal amendment for plants that thrive in acidic conditions, such as azaleas, rhododendrons, and blueberries.
Moreover, coffee grounds can also act as a natural pesticide, deterring pests such as slugs, snails, and ants, making them a great eco-friendly alternative to chemical-based pest control. Furthermore, coffee grounds can attract earthworms, which play a crucial role in maintaining healthy soil by improving its structure and nutrient content through their burrowing and casting activities.
However, it is important to take precautions when using coffee grounds in the garden, particularly with pets, as the caffeine content can be harmful to animals if ingested in large amounts. To ensure the safety of pets, it is advisable to either mix the coffee grounds well into the soil or compost them to reduce the risk of accidental ingestion by curious pets, especially dogs. By taking these precautions, gardeners can safely enjoy the benefits of using coffee grounds in their garden while ensuring the wellbeing of their furry companions.
Organic materials that are great for composting include food scraps, dry leaves, and vegetable scraps. Fruit and vegetable scraps, eggshells, coffee grounds, and grass clippings are also optimal for composting. These materials can be added to a compost pile in layers, with a balance of brown materials (like dry leaves) and green materials (like food scraps and grass clippings). The compost pile should be turned regularly to mix the materials and provide oxygen, and kept moist but not too wet. Over time, the organic materials will break down through the process of decomposition, creating humus. Humus is a nutrient-rich soil booster that improves the structure and fertility of the soil, providing essential nutrients for plants to thrive. The resulting humus can be added to garden beds or container plants to help promote healthy growth and improve overall soil quality. By composting organic materials, we can reduce waste while also enhancing the health of our gardens and the environment.
To set up a compost bin using a 5-gallon bucket, start by drilling small holes in the bottom of the bucket for drainage. Place small sticks or twigs at the bottom of the bucket to allow for air circulation and proper drainage. Next, drill several small holes around the sides of the bucket to allow for aeration.
For compost materials, include green waste such as fruit and vegetable scraps, coffee grounds, and grass clippings. Brown materials like dried leaves, straw, and paper can also be added. Layer the green and brown materials in the bucket, making sure to keep it moist but not too wet.
Find a convenient spot in your garden or yard to place the compost bin. It should be close to a water source and have good drainage. The area should also be easily accessible for adding materials and turning the compost.
By following these steps, you can set up a simple and effective compost bin using a 5-gallon bucket, allowing you to easily recycle organic waste into nutrient-rich compost for your garden.
Kitchen scraps that can be composted include fruit and vegetable scraps such as peels, cores, and stems, as well as coffee grounds, tea bags, and eggshells. Additional materials that can be composted include paper products like paper towels, napkins, and shredded newspaper. Coffee filters, yard clippings, and yard waste like leaves and grass clippings can also be included in the compost pile.
It's important to note that some kitchen scraps, like meat, dairy, and oily foods, should not be composted as they can attract pests and create odors. Additionally, avoid composting materials treated with chemicals or pesticides, as they can contaminate the compost.
When composting kitchen scraps, it's best to chop or shred the materials to speed up the composting process. Layering "green" materials (like fruit and vegetable scraps) with "brown" materials (like paper products and yard clippings) will help create a balanced compost pile.
By composting these kitchen scraps and compostable materials, you can reduce waste and create nutrient-rich soil for gardening and landscaping.
Brown composting materials, such as shredded paper, cardboard, and brown leaves, play a crucial role in the composting process. These materials are high in carbon content, providing the necessary energy source for the microorganisms that break down organic matter. Shredded paper and cardboard add structure to the compost pile, allowing for better air circulation and moisture retention. Brown leaves also provide essential nutrients and help maintain the proper carbon to nitrogen ratio in the compost.
In addition to these traditional brown materials, cow manure, mulch, and straw can also be used in composting. Cow manure is an excellent source of nitrogen, which balances the carbon from the brown materials. Mulch, made from shredded tree bark or wood chips, adds bulk to the compost and helps maintain the ideal moisture level. Straw, typically leftover from grain production, adds carbon to the compost and improves aeration.
When combined with kitchen scraps, green materials, and water, these brown composting materials contribute to the decomposition process, resulting in nutrient-rich humus that can be used to improve soil quality and support plant growth.
Green composting materials include grass clippings, fruit and veggie scraps, and egg shells. These items are rich in nutrients and are great for creating high-quality compost for your garden. However, it's important to avoid using onions and citrus peels in your compost, as their acidity can harm the composting process. The acidity level can disrupt the balance of the compost and create an unhealthy environment for the microorganisms that break down the materials. Instead, focus on adding grass clippings, fruit scraps, and eggshells to your compost bin to ensure a successful and effective composting process. By sticking to these green materials and avoiding acidic items, you can create nutrient-rich compost that will benefit your garden and help reduce waste.
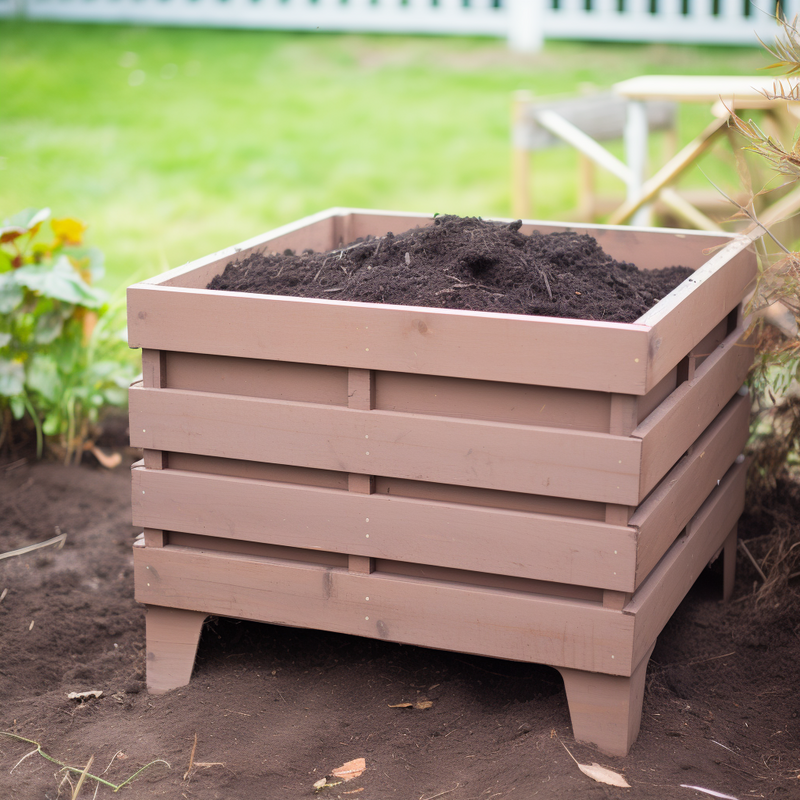
Composting is a great way to reduce waste and create nutrient-rich soil for your garden. Setting up a compost bin is an easy and efficient way to begin this sustainable practice. With just a few simple steps, you can start turning your kitchen scraps and yard waste into valuable compost that will benefit your garden and the environment. Whether you are a beginner or experienced gardener, setting up your compost bin is an important first step in reducing your carbon footprint and improving the health of your garden soil. In this article, we will cover everything you need to know about setting up your own compost bin, from choosing the right location and container to adding the right materials and maintaining your compost pile. By following these steps, you can start turning your organic waste into valuable, nutrient-rich compost for your garden.
The best location for your compost bin would be in a shady area, away from the house, and inconspicuous yet convenient for regular use. Look for a spot that receives partial shade throughout the day, such as under a tree or next to a building. This will help regulate the temperature inside the bin and prevent it from drying out too quickly.
Selecting a location away from the house will help minimize any unpleasant odors that may arise from the composting process. It’s also important to place the bin in a spot that is convenient for regular use, such as near your garden or kitchen, to make it easy to add scraps and turn the pile as needed.
In addition, it’s advisable to avoid placing the bin in full sun, which can cause the compost to dry out too quickly and hinder the decomposition process. By considering these factors, you can find the best location for your compost bin – a shady, inconspicuous area that is still convenient for regular use and away from the house to minimize any potential odors.
When layering materials, it's important to start with the largest and heaviest items on the bottom. This provides a stable base and prevents smaller items from being crushed. For example, when packing a backpack, place larger, heavier items such as a sleeping bag or tent on the bottom to create a solid foundation.
As you work your way up, consider the function and purpose of each layer. For instance, the middle layer could consist of clothing or soft items that provide cushioning and insulation. This layer not only protects the heavier items below but also keeps the contents from shifting during movement.
Finally, place smaller and lighter items, such as snacks or a first aid kit, on the very top for easy access. This ensures that the weight is distributed evenly and the backpack remains balanced.
Proper layering from largest to smallest items not only ensures stability but also gives each layer a specific function and purpose, creating an organized and efficient system for carrying and accessing your materials.
Are you a coffee lover with a green thumb? Adding coffee grounds to your compost bin is a great way to put those leftover grinds to good use, while also benefiting your garden. Not only does this organic material help to enrich the soil, but it also adds nitrogen, a crucial nutrient for plant growth. In addition to playing a role in reducing waste, adding coffee grounds to your compost bin can also help with managing odors and attracting beneficial earthworms. By following a few simple guidelines, you can effectively incorporate coffee grounds into your composting routine and contribute to the health of your garden and the environment. Keep reading to learn more about the benefits and best practices for adding coffee grounds to your compost bin.
Coffee grounds can be a beneficial addition to your garden, but it is important to use the appropriate amounts based on the type of plants and soil conditions. For most plants, a thin layer of coffee grounds can be spread around the base of the plants to provide nutrients and improve soil structure. This can typically range from 1/4 to 1/2 inch deep.
For acid-loving plants such as azaleas, rhododendrons, and blueberries, a thicker layer of coffee grounds (up to 1 inch) can be used to help lower the pH of the soil and provide additional nutrients. However, it is important to monitor the pH levels to ensure they do not become too acidic.
Using too many coffee grounds can lead to issues such as compacted soil, reduced water infiltration, and potential toxicity to plants. Coffee grounds can also impact the balance of air and water reaching the plant roots if used excessively, leading to poor growth and nutrient uptake.
In general, it is best to use coffee grounds in moderation and incorporate them into the soil to avoid these potential issues. Always consider the type of plants and soil conditions before adding coffee grounds to your garden.
Coffee grounds can be a great addition to your garden as they are a rich source of nitrogen, which is essential for healthy plant growth. You can add coffee grounds to your garden as often as once a week, but it is important to apply them sparingly to avoid nitrogen build-up. While nitrogen is beneficial, too much of it can harm your plants. To balance the addition of coffee grounds, it is important to use the proper ratios of carbon-based materials, such as dried leaves or wood chips. This will ensure that the nitrogen from the coffee grounds is balanced with the necessary carbon for healthy decomposition and nutrient absorption by the plants. So, while coffee grounds can be a valuable addition to your garden, it is essential to use them sparingly and in conjunction with other organic materials to maintain a healthy balance of nutrients for your plants.
 Author: David Manual